Main Content

[Grouse House Guide] Wolves, Roles, and Care

[Grouse House Guide] Wolves, Roles, and Care
Posted 2023-01-06 13:47:49 (edited)
Wolves, Roles, and Care

This guide covers everything that you need to know about your pack wolves: managing them, taking care of them, and assigning them roles within your pack!

You can navigate this post quickly by using the table of contents below.

This guide was last updated February 5, 2023.

Recommended Guide Order

Following our recommended guide order? This guide is the third guide on our recommended list.

We recommend starting off with our [Getting Started] guide if you haven't already. After this one, the next guide you should read is our [Pack, Territory, and Player Customisation] guide.

Table of Contents

1. Basic Wolf Info
2. Appearance and Decoration
3. Feeding, Playing, and Care
4. Death, Retirement, and Immortality
5. Wolf Roles
Credits/Contact Us
fridaySnack 🍉 (#1729) Valentine (#2873) Madchsky (#201) Lily (#3016)

Find links to all of our other guides and resources in our directory post, linked [here].

We have a Discord!
Join us in a kind Wolvden community with hundreds of members and the fastest communication with Grouse House creators! More information can be found [here].

Grouse Nest Discord

https://discord.gg/Nxc52bCWka
Mel 🏜
#201

Posted 2023-01-06 13:48:06 (edited)
Basic Wolf Information

Obtaining Wolves

There's a variety of different ways that you could start bringing new wolves into your pack!

Before making your pack too big, however, it's important to consider how you will be able to take care of all of the wolves. We recommend expanding your pack slowly to make sure that you'll be able to collect enough food and amusement to sustain them.

Befriending
Occasionally while exploring, you will happen across befriend-able wolves who you can attempt to recruit into your pack.

These befriend-able wolves, known as New Befriended Wolves or NBWs, usually have very basic traits. Generic NBWs will never have a higher than Tier 1 base. They will also always have Tier 0 markings.

After lead wolf level 10, you can start coming across Chased NBWs. These wolves, distinguishable by the purple star in the top left of the befriending menu, were chased by another player and thus have the chance to have any attribute in the game. However, they are very rare.

After lead wolf level 15, you can start finding Rated NBWs, which have one to five Special NBW-exclusive traits, based on how many gold stars they have in the top left of the befriending menu.

There is not currently any way to increase the likelihood of coming across a befriend-able wolf, but the lead wolf talent Wolfy Odour increases the chance of a befriend-able wolf being a chased or rated wolf by 5%.

You can learn more about befriending wolves in our [Befriending guide].

Trades, Raffles, and Giveaways
Another very good way to obtain more interesting wolves and introduce new genetics into your pack is through interacting with other players.

You can search the [Trading Center] for wolves currently up for sale. Navigate to the Search Trades tab and then the Wolves section for details search options to help you refine your search.

Many players also choose to put their wolves up for raffle. You can find these in the [Raffle Hub]. Keep in mind that entering a raffle does not guarantee that you will win the wolf in question, and the materials that you use to enter will not be returned to you if you do not win.

Finally, there's always lots and lots of wolves being given away! You can keep an eyes on the Giveaways chat for wolves you can Claim using the Claim button in the three-dots menu. You can also check the Giveaways sub-forum.

More information about trading with other players as well as Wolvden commerce in general can be found in our [Crossroads and Commerce] guide.

Breeding
Breeding is a great way to introduce unique traits into your pack and broaden your wolf lineages. This is a breeding sim, after all, and breeding leads to lots of possibilities!

You can learn all about breeding in our [Breeding guide].

If you are interested in introducing new traits and heritage into your pack, you may choose to breed to an outside stud! These studs belong to other players and can be bred to with a fee set by the owner. You can search for studs on the Search page. Navigate to the Search for Wolves tab. Then, under the blue options dropdown, check the For Stud box. From there, you can further refine your search to find a stud with the exact traits you are looking for.

Customisation
A final option for bringing a new wolf into your pack is the Customiser! This can be found in the Grove, and allows you to create a new, fully custom wolf from scratch for a GC price.

The wolf will always be heritage-less and have 200 stats (40 in each individual stat).

The Customiser includes all options which can also be found in the separate applicator items located in the Grove. This includes some Tier 2 bases, Tier 0 and Tier 1 markings, and some unique custom eyes and accents.
Mel 🏜
#201

Posted 2023-01-06 13:48:20 (edited)
Basic Wolf Information

Basic Wolf Information

Every wolf has a combination of stats, genetics, status, and more, that can help define their value or lay out their condition.

Status Bars

Energy

Energy Bar Locations
This is where the energy status bar is located.

Energy allows your pack wolves to complete tasks. Lead wolves use energy to explore, while pack members use energy in their roles. If your wolves do not have energy, they are unable to explore or start tasks.

Energy refills at a rate of 10% every 7.5 minutes for lead wolves. For pack members, it refills at half the rate, so 5% every 7.5 minutes. Pregnant wolves refill energy half as slow, and starving wolves also gain energy slower.

This means that lead wolf energy bars will fully refill after 1 hour 15 minutes and pack member energy bars will fully refill after 2 hours 30 minutes.

Lead wolves can also regain energy while exploring with random encounters, however it's likely you will lose more energy exploring than you will gain back from the encounters.

Mood

Mood Bar Locations
This is where the mood status bar is located.

The mood status bar indicates the happiness of your wolves. At 100% mood, they are completely satisfied and they do not need any more amusement. At 0% mood, they are unhappy.

All healthy wolves lose 10% mood every rollover. Wolves with any illness lose 20% mood every rollover.

Beginning at 30% mood, pack members will have a warning on their page, and they will leave the pack if their mood drops below 0. Unlike normal pack members, your breeding male will not leave your pack if their mood drops below 0.

Hunger

Hunger Bar Locations
This is where the hunger status bar is located.

The hunger status bar indicates how hungry your wolves are. At 100% hunger, they are completely full and they do not need any more food. At 0% hunger, they are starving.

All wolves, unless they are unweaned pups, lose 20% hunger every rollover. If the wolf has the Tapeworms illness, they will instead lose 30% hunger every rollover.

Beginning at 30% hunger, pack members will have a warning on their page, and they will leave the pack if their hunger drops below 0. Unlike normal pack members, your lead wolf and breeding male will not leave your pack if their hunger drops below 0.

Wolves with hunger at 20% or less will regain energy half as quickly as more fully-fed wolves. Pack members at this low hunger recover energy at a rate of 3% every 7.5 minutes, while lead wolves at this low hunger recover energy at a rate of 5% every 7.5 minutes.

In addition to the above-mentioned effects, failing to fully feed and play with a wolf every rollover can also have effects on their weaning pups' survival chances, or a pup's own survival chances if they are weaned. The effects of survival chance in relation to hunger and mood is outlined below.

Rollover Survival Boosts and Penalties
Hunger and MoodSurvival Effect
100% Hunger and 100% mood+7% survival chance
100% Hunger and less than 100% moodNo survival change
Less than 100% Hunger and 100% mood-8% survival chance
Less than 100% Hunger and less than 100% mood-15% survival chance


As such, keeping your wolves fully fed and entertained is very important!

Health

HP Bar Locations
This is where the HP bar is located.

The HP, or health points, status bar indicates your wolf's health. Wolves can lose HP in a variety of ways including random explore encounters, injuries suffered while hunting or scouting, or illnesses. Puppies can lose HP if they are injured on rollover.

HP does not restore automatically throughout the day. The only way to restore HP is to use medicines such as Healing Salves, or to wait until rollover when healthy wolves will regain 4 HP.

Normally, wolves at 0 HP are not at any risk and you can take your time healing them. However, at 0 HP, wolves cannot scout or hunt. Additionally, if the wolf has a [fatal illness], they will die if they fall below 0 HP.

Experience

EXP Bar Locations
This is where the EXP status bar is located.

The EXP, or experience, status bar indicates your wolf's level. Wolves gain EXP through normal gameplay by completing tasks and exploring. After a wolf has earned enough EXP, they will level up. Upon leveling up, they will gain an assortment of stats equal to double the level they became. So, if the wolf leveled up to level 10, they will gain 20 stats. After leveling up, the EXP bar falls back to 0%.

More information about EXP and leveling up is available further down in this guide.

Wolf Details

Wolves have a variety of tables and buttons on their pages that provide all the information you need to know about them.

Currents
The Currents table lays out the current status of your wolf. Here, you can find their age, sex, status bars, and personality. These stats are listed in this table because they are all variable. The age of the wolf increases 0.5 months every rollover. Wolves' sexes can be changed using a Sex Changer, available for purchase in the [Grove]. Wolves' personalities can be changed using personality changers, available for purchase from the [Personality Snake]. More information about personalities and their effect on gameplay is available in [this guide].

Currents Table
A wolf's Currents table.

Breeding Information
The Breeding Information table contains everything you need to know about a wolf's breeding stats. This includes how many pups they have bred in their lifetime, when they were last bred, their fertility, their heat cycle, and more.

The Pups Bred section of the table counts how many pups total a wolf has bred. This does not only count how many pups are currently alive, as it includes chased, enclaved, and deceased wolves as well. The currently alive offspring can be found on the wolf's family page.

A wolf's fertility has a few effects on their breeding, such as increasing the chance for random mutations. More information about fertilities, heat cycles, breeding items, and more is available in [this guide].

Breeding Information Table
A wolf's Breeding Information table.

Looks & Markings
The Looks table and the Markings table detail the wolf's genetics. Most of the attributes laid out in these tables affect the physical appearance of the wolf. More information about wolf genetics is available in [this guide].

Looks and Markings Tables
A wolf's Looks and Markings tables.

Birth Information
The Birth Stats and Birth Information tables provide insight on your wolf's state at birth.

Birth Stats will list each of your wolf's stats at birth (pre-training). This information will be Unknown if the wolf is freshly rolled, created, or befriended.

Birth Information will list the moon phase and season the wolf was born under and the biome they were born in. Note that these are according to Wolvden time and seasons, which you can find next to your lead wolf picture on the sidebar. This information will not be available for freshly rolled, newly created, or befriended wolves.

Moon phase, seasons, and birth biome do not affect the wolf in any way, and they are just displayed here for fun.

Mel 🏜
#201

Posted 2023-01-06 13:48:39 (edited)
Basic Wolf Information

EXP and Leveling

Every wolf gains experience and levels up! Leveling up grants higher stats and greater performance, as well as lots of perks for lead wolves especially!

Experience (EXP) is your wolf's progress towards leveling up, represented as a percentage. Hovering over the EXP bar on a wolf's page will show you the exact number values. The amount of EXP that is required to reach the next level increases each time your level up, meaning that each subsequent level will take longer to reach.

All wolves start at level 1 with 0% experience. The max level that wolves can reach is 20. Once a wolf has reached Level 20, they will continue to gain EXP, but it will not do anything. Wolves can continue earning stats from their roles or from battling at Level 20.

Lead wolves can earn EXP by battling opponents while exploring or by completing [Daily Quests]. Pack members can earn EXP by scouting, hunting, foraging, making medicine, pupsitting, or mentoring. Once they have enough EXP, leveling up a wolf will reward them with stats. The amount of stats they will gain is equal to 2x the level they became. So, if the wolf leveled up to level 10, they will gain 20 stats. Wolves will also have all of their HP restored upon leveling up, and they will gain +1 max HP.

At higher levels, pack members perform better in their roles. Most notably, herbalists at higher levels craft medicines faster. At higher lead wolf levels, players can find rare wolves while exploring, get trophies from winning battles, and equip talents.

Stat Allocation
By default, when leveling up a wolf, you will be prompted with a level up menu, detailing the stat allocation of that level up.

Point values will be listed under each stat. The suggested stat allocation prioritizes your wolf's two highest stats. 35% of the stats gained will fall under both of the highest stats. The remaining 30% will be scattered randomly. If your wolf does not have two highest stats, the allocation will be random.

If you don't like this suggestion allocation, you can use the drop-down menus to decide which stat will get each point value. You cannot change the point value, only the stat it is assigned to. If you have chosen to manually edit the assigned point values, be sure to click the blue "Use Manually Assigned Stats" button to ensure that your choices are applied.

If you don't want to worry about selecting an allocation each time, and you know exactly which stats you want for your wolf, you can assign their Priority Stats in their Settings menu, which will be touched on in the next section.

Stats

With all of that leveling up, your wolves surely have some stats piled up. But, what do they do?

Stats strongly affect how most wolves perform in their roles, and some roles even have specific stats they use exclusively which you should prioritize.

Earning Stats
Wolves earn stats by completing their roles or, in your lead wolf's case, by battling! Stats are also earned from leveling up, as explained a bit earlier.

Besides from leveling up, pack wolves can earn up to 4 stats per day, and the stats they are capable of earning are often dependent on their role or location. Lead wolves can earn an unlimited amount of stats each day.

For example, hunters will only be able to earn the stats associated with their roles on the team, detailed below (Chasers will only earn Speed and Agility, etc.). Scouts will earn the stat associated with the biome they're scouting in, according to this map, and Herbalists will only earn Wisdom and Smarts.

Stats for Each Role
Hunters

  • Stalkers: Smarts and Wisdom
  • Chasers: Speed and Agility
  • Finishers: Strength
The Smarts and Wisdom of your hunting party's stalker will determine the type of prey that can be found. Meanwhile the Speed and Agility of your Chasers and the Strength of your finisher will affect the success percentage.

Scouts

That stat that your scout uses depends on which biome they are visiting. The stats of each biome are listed on the map below.

For most of the biomes, the listed stat will just affect the amount of the biome that your scout will discover when initially scouting the biome.

However, for the most difficult biomes, Glacier and Rainforest, stats become much more important. If your scout does not have at least 101 Wisdom, they will not be able to discover the Glacier. If they do not have at least 101 Strength, they will not be able to discover the Rainforest. Therefore, many argue that the most important stats for scouts are Wisdom and Strength.

Also note that stats do not affect Rescouting, only initial discovery of biomes.

Herbalists

The herbalism tutorial claims that the best stats for the Herbalist role are Smarts and Wisdom. However, there is currently no proof gathered by the community to indicate that these stats have any effect. As far as we are aware, stats do not affect a herbalist's performance in any way.

Do note that this is only community knowledge, and you may choose to follow the game's recommendation just in case!

Pupsitters

A pupsitter's performance is not affected by stats, only proficiency. However, many users like to make sure their pupsitters have high Speed. This is due to the fact that Pupsitters can teach the 3-hour pup training lesson in Speed, and having a high stat value is important for wolves teaching pup training lessons.

Mentors

Like mentioned above, stats are very important for wolves teaching pup training lessons, which is what Mentors are meant for!

The stat they will need is based on the lesson they are giving. If they are teaching an Agility lesson, you should make sure that they have high Agility.

If the specific stat of the tutor isn't at least 50% more than the stat of the pup that's being trained, the pup will lose -1 stat boost per hour of the lesson. For example, if the puppy has 50 STR and the tutor does not have at least 75 STR, and they are teaching a three hour lesson, the puppy will only gain +6 STR instead of +9. Additionally, if the teacher's stat is the same as or even less than the pup's, the pup being trained will lose -2 stat boost per hour of the lesson, resulting in +1/+2/+3 rather than +3/+6/+9.

Lead Wolves

Stats affect how well your lead wolf will perform in battle!

Each turn in battle is based on a dice roll. If the dice roll is high enough, your move will be successful. If the dice roll is too low, your move will fail.

Most moves in battle have an associated stat. With high enough stats, modifiers will be applied to dice rolls for that move which make it more likely for the move to succeed. The higher the level of the opponent and the stronger they are, the higher stats your lead wolf will need for this modifier to be applied.

In addition to this, each battle opponent has certain stats that they correspond with. It's these stats which affect the initiative roll -- the dice roll that decides which of you moves first. If you have high enough of the initiative stat, you will be able to make the first move. You can view every opponent and their associated initiative stats in our [Battle Opponent Masterlist].

The only stat which is not used in battle is Wisdom. Besides this, every other stat can be important.

Wolf Settings

Your wolf settings can be found at the bottom of their page. Navigate to the Settings tab to find them!

Here, you can edit your wolf's details and role, secure them, and chase them.

Customisation
You can change your wolf's name at any time, and multiple wolves can have the same names. Keep in mind that the character limit for wolf names is 25.

Wolves other than your lead wolf can also have footnotes! These show up in small text underneath their name on your Den page and on the wolf's page.

Your wolf's biography will appear at the bottom of your page for all players to read. You can use any HTML coding in your wolf's biography, to add images, links, spoilers, and more!

Underneath the biography section, you can choose to set the wolf as you Featured Wolf. You can only have one featured wolf selected at a time, and it will appear at the top of your Den page next to your lead wolf. Your featured wolf will also be displayed next to your lead wolf's portrait on the sidebar. If you would like to remove this portrait, you can toggle the setting on your Profile page.


Gameplay
Underneath the name and footnote, you can edit your wolf's role. If you already have two Scouts and/or one Herbalist, those options will be unavailable. In addition, the Mentor role will only show up here the wolf is at least 5 years old and level 5.

Following this, the Cave option will let you quickly edit which cave the wolf is located in. You are unable to move wolves back into the "Unsorted" section of your Den after you have already moved them into a cave.

Priority Stats
Finally, the Priority Stats section is where you can select two stats which will automatically receive the highest point allocation upon leveling up.

If you select two stats, each of them will get 35% of the total stat points granted upon leveling up that wolf. This will be automatic and you won't have the option to confirm to edit the stat allocation unless you remove the priority stats beforehand.

If you select only one stat, that stat will get 35% of the stats granted. Your wolf's next highest stat will receive the other 35% automatically, and the remainder of the points will be allocated randomly.

You can use the Priority Stats options to help specialize your wolves in their roles. For example, if your wolf is a Chaser, you can assign their Priority Stats to be Speed and Agility. This will ensure that they will always get more Speed and Agility when leveling up, and those stats can become their highest, so they will perform better in their role.

Securing and Chasing
The menus for securing and chasing wolves are located beneath their settings.

Securing a wolf means that it cannot be chased, retired, or traded away.

It is recommend that you secure any wolf you don't want to accidentally lose.

Chasing a wolf will remove them from your pack permanently. There is no way to retrieve a chased wolf.

If the wolf you chase is an adult, they have a very small chance of showing up as a befriend-able wolf for another player in explore.

Traveling Wolf
If you have the Traveling Wolves option enabled on your Profile page, an additional menu for setting a wolf as a Traveler will appear at the bottom of their settings.

This menu provides all of the important details you will need to keep in mind when setting your wolf as a traveler.

At the bottom, you can set the wolf as a traveler and decide if they will be breedable or not. This is a secondary role that any wolf can be given, regardless of their current primary role.

Heritage and Family

A final factor of a wolf's information is their heritage and Family. While it may seem unimportant on the surface, it can strongly affect how valuable your wolf is in the trading market.

You can view a wolf's family from their page. Click on the Family button underneath their stat box to go to their Family page.

At the top of the page, you'll find three values: Coefficient of Inbreeding, Instances of Inbreeding, and Generation. These will be touched on in the next section!

Underneath this, your wolf's family tree will be visible. This will list all of your wolf's ancestors. The top tree in this pedigree is the paternal/father's side tree, while the bottom is the maternal/mother's side tree. Clicking on the name of any wolf is this pedigree will bring you to that wolf's separate family page.

For an individual wolf, you will only be able to view up until the Great Great Grandparents. If you want to look further back on the family tree, you can select one of the great great grandparents, and look at their own tree!

If the wolf is a NBW, freshly rolled lead, or a new custom wolf, their family tree will be listed as "Unknown". If a wolf in the family tree has passed, they will still show up normally. However, if the wolf has been chased, they will show up as a black silhouette.

There isn't any way to edit or change a wolf's family tree. This is their legacy, after all!

Inbreeding Coefficient
A wolf's inbreeding coefficient provides information on how related a wolf's parents are.

It is calculated by comparing the father's side of the family tree against the mother's side of the family tree. If wolves that appear in the father's side of the tree also appear in the mother's tree, then a rate of COI is present for the offspring.

A lower COI means that inbreeding is more distant, while a higher COI means that inbreeding is more recent.

A COI of 0% means that the mother and father are not related. However, this does not mean that the wolf is not completely inbreeding-free. If the mother is inbred, but does not share any common ancestors with the father, then the wolf's COI will still be 0%.

A COI of 25% means that a pup has been bred to its parent or full sibling. A COI of 12.5% means that half-siblings have been bred, or a grandchild has been bred to a grandparent. A COI of 6.25% means that first cousins have been bred, or a great grandchild has been bred to a great grandparent. Any COI greater than 25% means that there are more than on instances of inbreeding in the family tree.

COI is only calculated on the first page of a wolf's family tree. If their parent's are related past their grandparents, it will not be included.

Instances of Inbreeding
The instances of inbreeding value represents how much inbreeding is present in a wolf's family tree.

Inbreeding in this case is defined by one wolf appearing in the tree more than once, whether on both parents' sides or one parent's side.

In this example, the wolf has one instance of inbreeding because ✹ ƟMƝƖΔ shows up on the family tree twice.

Instances of inbreeding are only calculated on the first page of the wolf's family tree. So, if a wolf's great great great grandparent is also their father, they will not have any instances of inbreeding shown.

Generation
A wolf's generation displays how far back its family tree goes.

Any wolf is always at least 1st Generation. If the wolf does not have parents listed on the family tree, it is 1st Generation. 1st Generation wolves are often also referred to as "NBW" or "New Befriended Wolf", because all wolves you claim from exploring are 1st Generation.

For every additional column of wolves that goes back on the family tree, you can add one generation.

For example, this wolf is fourth generation, because the further back line in their family tree stops at 3 out. With the wolf itself already being one generation, you then add 3 to this, to get 4th generation.

This value counts as far back as the family tree goes, even if it extends off of the first page of the family tree.

Effects of COI, Inbreeding, and Generation
The COI, instances of inbreeding, and generation of a wolf do not have any effect on any game mechanics.

These values are purely for lore or personal use, as well as market value. Lower generation wolves with no COI and no inbreeding are highly valued in the market.
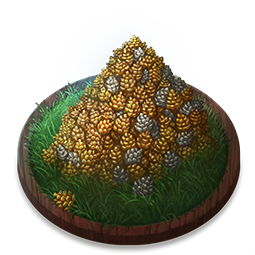
Mel 🏜
#201

Posted 2023-01-06 13:51:55 (edited)
Wolf Appearance and Decoration

Appearance Overview

Some of the most enjoyable parts of Wolvden have to do with customizing your wolf's appearance! In order to do this, though, you first need to understand why your wolf looks the way that it does. Then, you can learn what you can do to change it!

Bases and Small Details
Like mentioned earlier on in this guide, every wolf has Looks and Markings, visible on their page. These tables display specific values that determine your wolf's appearance.

A wolf's Base is just what it sounds like -- it's the base color of your wolf! If your wolf has a lot of markings, this base might be hidden. If not, the base is likely one of the most defining features of the wolf!

There's also some smaller features that can make a big different: Eyes, Skin, Noses, and Claws! Each of these is a separate trait, but most Skins, Noses, and Claws come in sets. For example, the "Dius" set includes Dius Nose, Dius Skin, and Dius Claws.

Markings
On top of your wolf's base will be their Markings! These can really make or break a wolf design. In fact, if you don't like your wolf's base, you could cover it up completely with markings!

Each wolf can have a maximum of ten markings. Markings are organized into slots, which indicate their layering. Slot 1 is on the bottom, while Slot 10 is on the top. If the marking you choose to put in Slot 10 is big and covers a large part of the wolf's body, you may not be able to see any of the markings beneath it.

To demonstrate how much markings can change a design, here's four different wolves, each with the same Black base, but 10 different markings!

However, markings also come with an additional value to help with this layering, called Opacity. Opacity represents the transparency of a marking. A marking with 1% opacity will be almost completely transparent, while a marking with 100% opacity is completely opaque.

Secondary Mutations
Mutations are an additional aspect that affects some wolves. Not every wolf will have a mutation -- they must be bred for or applied! You can read all about mutations in our mutation guide here.

Specifically in regard to your wolf's looks, there are two categories of visual mutations. Primary mutations (explained in the next section) change your wolf's entire pose. Secondary mutations add a new layer over top your wolf's normal appearance.

Mutations like Melanism and Albinism cover your entire wolf. Melanism allows for only your wolf's eyes to be seen, but this is not the case for Albinism, which hides everything. Piebald mutations are similar to Albinism, but only cover patches of your wolf, not everything.

There's also Hereditary Cataracts and Blindness, which hide only your wolf's eyes!

Primary Mutations and Variants
A few aspects of your wolf's genetics and decoration will change their entire image - lineart and all!

Primary mutations are mutations wolves can be born with which change how they appear. Wolves with primary mutations never live past pup-hood, but can be immortalized to keep around forever!

You can also choose to change your adult wolf's pose using Variants! There are two variants in-game at the moment. Pose Variant [Sentinel] is a crafted item, whose recipe can be found very rarely while Rescouting. Pose Variant [Relaxed] can be purchased for 3 GC from the Grove.

Pup Stages
Have you noticed that some players' puppies look a bit different from yours? You can add some extra visuals to your pup's development through the Pup Stages addition!

This is purchasable for 50 GC from the Grove. After it's purchased, it's permanent, and will be applied to all of your puppies. Note that this only affects pups in your pack, not other packs that you view.

The purchase comes with two additional life stages: newborn and young. These are purely visual and do not add anything mechanic-wise to your game.


Equipping Decorations and Backgrounds

To add onto all of the variety your wolf's genetics can hold, you can also add decorations to them, to spruce them up even more!

Decorations and backgrounds can be obtained through a variety of different means, including exploring, shopping, and crafting! You can view a list of all decorations and where to get them here, and all backgrounds here. There are also a ton of custom decors created by other players, which you can find here!

Once you've obtained a decor or background you want to equip to your wolf, you can navigate to the Wolf Equipper. Select the wolf you want to decorate from the dropdown, and then click on the decor or background you want to add at the bottom of the menu! Items will only appear in the Equipper if they are in your Hoard and not buried.

Clicking on the arrows on the right side of the menu will adjust the decor's positioning. Decors at the bottom of the list will be displayed above decors at the bottom of the list. You can also remove a decor from a wolf in the Equipper by clicking the X button.

Decorations and backgrounds can only be applied to one wolf at a time, and each has a set amount of uses. One use is taken up whenever you apply the item to a wolf. So, if the item has 10 uses and you apply it to one wolf, then remove it, it will drop down to 9 uses. You will be able to apply and remove the item from 9 more wolves before it is destroyed.
Mel 🏜
#201

Posted 2023-01-06 13:54:38 (edited)
Feeding, Playing, and Care

Like touched on earlier in this guide, keeping your wolves fed and played with is very important! Neglected wolves will suffer energy consequences, be unable to complete tasks, and could even leave your pack.

Feeding and Playing with Your Wolves

You can feed and play with your wolves from either you [Hoard] or from the wolf's individual page.

Feeding/playing from your Hoard allows you to care for multiple wolves in rapid succession, rather than having to select an item from a dropdown menu each time. In your Hoard, you can also select exactly how many uses of an item you want to use on a specific wolf, and even feed/play from entire stacks of items.

Feeding/playing from the wolf's page is a lesser option, but still possible if you want to check personally on your wolves each day!

Feeding

You can feed your wolves carcasses and meat that you collect while playing. An item can be fed to your wolf is it has the "Food" category, such as all of the items listed [here].

Wolves are not able to be fed if they are already at 100% hunger.

Every food item regardless of size restores 10% hunger per use on adult wolves, and 20% hunger per use on weaned pups.

Rotting Food
Feeding presents an additional important factor you should consider... rotting food!

Rotting food is identifiable by a red background in your Hoard. If a food item has this red background, it will disappear from your hoard, or "rot",  the next rollover.

Every time you feed a wolf a rotting food item, there is a chance that the wolf will contract an illness from it. This is per the number of times a wolf is fed rather than how many uses it is fed. So, if a wolf is fed a rotting item with 10 uses all at once, they will have less of a chance to contract an illness than if they were fed 10 rotting food items with 1 use each.

You can also Salvage rotting food for a chance of getting some bones from them. There is a small failure rate of 5%, where the carcass was too far gone to gather bones anything useful from it. If the salvage succeeds, though, you will receive bones with uses equal to half the uses the carcass had (rounded up if necessary). So, if you salvaged a 15-use carcass, you would get 2 bones, one with 5 uses and one with 3 uses.

You cannot salvage food items which would not realistically have bones, like eggs.

Playing

You can play with your wolves using assorted amusement items like feathers, bones, and more! An item can be used to entertain your wolf if it has the "Amusement" category, such as all of the items listed [here].

Wolves are not able to be played with if their mood is already at 100%. In addition, only pack members require their mood to be attended -- lead wolves do not have mood values.

Every amusement item regardless of size restores 10% mood per use on all wolves.

Feed-All Play-All
Tired of feeding and playing which each of your wolves individually? The Feed-All Play-All perk may be perfect for you.

For a GC fee in the [Grove], you can activate Feed-All Play-All (FAPA), with price increasing based on who long you would like to have it.

The feature is based on a subscription model. You can purchase 30 rollovers of FAPA for 10 GC, 180 rollovers for 60 GC, and 365 rollovers for 120 GC. After purchase, the feature it automatically enabled and cannot be disabled until your subscription period is over.

Once you have purchased FAPA, a new menu will appear near the bottom of your Den page, right below where you can create a new cave.

Caring for wolves using FAPA is not automatic. In order to use the feature, you must click the Feed or Play buttons in this menu. It's also important to note that FAPA still requires you to have a sufficient amount of food and amusement items. If you do not have enough items in the un-buried section of your Hoard, FAPA will not be able to care for all of your wolves fully.

On the right-hand side, you can select which wolves you want to feed or play. This is sorted by cave. You can feed or play with all of your wolves, or you can select just one specific cave of wolves to interact with.

After you've selected a cave, clicking the Feed or Play button will automatically take items from your Hoard and give them to needy wolves.

Feeding All will feed the wolves with the lowest hunger first, using the soonest rotting items first. Feed All will not feed your wolves actively rotting food, food which has a red background in your Hoard.

Like Feed All, Play All also plays with the lowest mood wolves first. Order-wise, it uses Amusement Scraps first and the lowest-use items first.

However, Play All also presents the player with a couple additional options. Opening the Play All menu, you will be able to choose to only use Amusement Scraps, exclude Acorns from the function, or both! This way, you won't have to worry about burying any important items you may not want to lose.

Neglect

If wolves are not fed or entertained often, they will become unhappy. At 30% hunger or 30% mood remaining, a wolf will gain an icon to signal that they need attention. At 20% hunger, wolves will also start to regenerate energy at half the speed.

At 10%, the wolf will gain an additional warning icon indicating that they may leave the next rollover if not fed or entertained.

Once a wolf has fallen below 0% hunger or mood, they will leave your pack. Lead wolves and breeding males will not leave your pack if they are unhappy.

Hungry This wolf is hungry
Unhappy This wolf is unhappy
Leaving This wolf will be leaving next rollover


Luckily, you can reclaim wolves that have left your pack from neglect or lack of space. You have three rollovers after a wolf has left to reclaim them, and it will cost 100 SC per wolf to bring them back. This can be done at the bottom of your den page, under your caves.

Illness

Starting from your 4th rollovers, your wolves will begin having the chance to get sick through hunting and scouting, breeding, exploring, losing a battle, or by eating rotting food. They can also get sick randomly on rollover.

When a wolf has symptoms of an illness, an illness icon will display by their name on your den page, and a banner will appear on their page.


In order to cure each illness, you must first Diagnose them on the Sick Wolves tab of the Herbalist page. After this, you will be able to give them the required medicine. If you don't have a needed medicine, your herbalist can craft it for you with a few herbs. Each illness corresponds directly to a single medicine, and each medicine has the illness's name is the medicine name besides the Antidote, which cures Poison. Any illness can also be cured with a Cure-For-All.

Each illness has different effects on your wolf, and some are more severe than others.

You can view a full list of all illnesses and their effects, as well as more information about Herbalism in our [Illnesses and Herbalism] guide.

HP and Fatal Disease

Like mentioned earlier in this guide, each wolf has a Health/HP value. Wolves will lose HP through normal gameplay, and can typically gain it back the next rollover, as each rollover gives each wolf +4 HP.

It's not usually a worry if your wolf is at 0 HP -- the only downside is that they cannot complete any tasks.

However, illnesses make keeping up with wolf HP a bit more difficult. Many illnesses cause your wolf to lose a certain amount of HP every rollover. In addition, some illnesses are fatal, and will kill your wolf if they reach 0 HP.

It's important to keep an eye on your ill wolves to ensure that they do not have any of the following fatal illnesses:
  • Distemper
  • Heatstroke
  • Infection
  • Poison
  • Pox (for puppies only)
If your wolf does have one of these fatal illnesses, you will want to make sure they never drop to 0 HP. You can give them Healing Salves from your Hoard, or just diagnose and cure them quickly enough for it to not become an issue.
Mel 🏜
#201

Posted 2023-01-06 13:56:40 (edited)
Death, Retirement, and Immortality

Wolf Death

Every wolf will die at one point -- it's an unfortunate inevitability. Luckily, you can prepare for when the time comes, and even take action to keep your wolf around (albeit, not "living") forever!

Old Age
Pack members have the chance to start dying at the age of 7 years and 6 months. Once they rollover into this age, and up until they are exactly 8 years old, there is a chance every rollover that they will pass naturally of old age.

Pack members are guaranteed to die by the age of 8 years. Breeding males, if they are not also your lead wolf, follow this same formula, and do not get a lifespan extension just because they are a breeding male.

There is no way to predict which exact age your pack member will pass.

Lead wolfs always die at the age of 8 years old, so you'll have time to ensure that your heir is in a good place before this exact day! Rolling over on the day your lead wolf turns 8, you will be greeted by the below menu to select a new lead wolf.

When a pack member passes, you will receive a notification about it in your Daily Rollover Summary.

Fatal Illness
Besides old age, the only other way for wolves to die naturally is by fatal illness.

There are 4 fatal illnesses, Distemper, Heatstroke, Infection, and Poison, which will kill your wolf is they go into a rollover with the illness and 0 HP.

One fatal illness, Pox, is guaranteed to kill any pup if they rollover with the illness, no matter what their HP is at.

Wolves killed by fatal illnesses will be sent to your Dynasty just like any other deceased wolf. There is no way to revive them.

Luckily, your lead wolf and breeding male cannot be killed by fatal illnesses.

Retirement

If you don't want to wait until your wolf dies of old age, or inflict them with a fatal ailment to kill them, you can choose to Retire them.

Retirement is the same things as death. Retiring a wolf will send them to your Dynasty. The option can be found on a wolf's page, under their stats.

All wolves require a fee to retire early. Up until the age 7 years and 6 months, pack members will require a SC fee to retire earlier, the cost of which lowers the older the wolf gets.

Lead wolves can never be retired early for free, and will always require a 20 GC early retirement fee if you don't want to wait for them to pass at 8 years old.

A GC fee is also required to retire your breeding male, as retirement also requires that you remove them from the breeding male role. The base fee for removing a breeding male is 25 . If it's been fewer than 30 days since your last breeding male removal, an additional 20 GC fee is added, for a total of 45 GC. There is no way to retire your breeding male for free.

Dynasty

Once a wolf has died or been retired, they will be moved to your Dynasty. This is where you can store records of your previous wolves.

Immediately after a wolf dies, their records will appear in the "Unsorted" section of your dynasty. If they were a lead wolf, they will be in the Former Leaders tab, while every other wolf will be in the Pack Members tab. Wolves will keep all of their decor when they move to your dynasty, and you must remove it manually if you want to reuse it.

If you have enough dynasty slots, you can press the green plus button next to the record to store it permanently. If you do not store the record, it will be permanently deleted after 5 rollovers. There is not a way to restore a record which has expired.

You can view your total dynasty slots in the top right of the page. If you do not have enough dynasty slots to store a record, you must spend GC to purchase more. The maximum dynasty slots you can have is 400.

Wolves in your dynasty can be decorated and edited like living wolves, but they cannot have footnotes.

Immortal Wolves

It's inevitable that you'll eventually find a wolf you never want to lose. Whether it's your first lead or your first mutation, it's hard to give them up.

Luckily, there's a way to keep your favorite wolf around forever!

Immortalizing a wolf will keep them in your pack permanently as an age-less, frozen, and unusable wolf.

In order to balance their immortality, these wolves cannot do anything. Essentially, they act as decorations in your pack!

You can decorate them and edit them to your liking, as you can any other wolf. Unlike any other wolf, immortal wolves cannot have roles, cannot gain experience and level up, and cannot breed. They will also forever remain the age you immortalized them at. Luckily, you never have to feed or amusement them!

You can trade immortal wolves to other players, as long as they have an open immortal slot. If you change your mind about immortalizing a wolf, you cannot bring them back to life. Your only option it to retire them to your Dynasty. You will not get your Jellyfish back. If you change your mind after retiring them to your Dynasty, you can just immortalize them again! Dynasty wolves can be immortalized, just like living wolves.

Immortalizing a Wolf
In order to immortalize a wolf, you'll need a few things. Immortalizing always requires some GC.

You will need to purchase a Jellyfish from the Grove for 10 GC or win one from the Slots machine.

Then, you have to purchase an immortal slot at the bottom of your Den page. Your first immortal slot will cost 10 GC, and each subsequent slot will cost an additional 10 GC. The maximum amount of immortal slots you can have is 20.

There is no way to obtain immortal slots for SC.

After you have these two tasks completed, find the Jellyfish in your Hoard. You can select the wolf you want to immortalize from the dropdown menu, easy as that!

Immortalizing Troubleshooting
To ensure that everything goes smoothly, immortalizing a wolf comes with a lot of requirements. Below is a list of all of the reasons that a wolf may not be showing up in the dropdown menu as an option to immortalize.

  • The wolf has a role.
  • The wolf is in a pairbond.
  • The wolf was bred recently -- wolves must breeding cooldown of less than 16 rollovers.
  • The wolf is being protected by a pupsitter.
  • The wolf is training pups.
If you've made sure that none of the above apply to your wolf, and you still cannot immortalize them, you could make a post in the Game Help board to see if anyone else can figure out why it may not be working!

Mel 🏜
#201

Posted 2023-01-06 14:00:05 (edited)
Wolf Roles

Once your wolf is an adult, they can be given a role to contribute to your pack! Some roles have specific requirements, and some restrictions may prevent a wolf from taken on some roles, but, for the most part, every adult wolf can take on any role you choose! There's some strategy to choosing which wolf gets which role, though, and we'll explain it all here for you!

You can assign your wolf a role in the Settings tab on their page.

Pack Sustainability

These roles are the most important. They help you keep your pack alive and progressing!

These roles are unlocked within the first four rollovers of playing from completing Unique Quests.. If you do not see these roles available for you wolves, make sure to check the Questing page to see if there's any Unique Quests you've missed!

Hunters
Hunters are in charge of collecting food for your pack.

There is no limit to how many hunters you can have. We recommend starting with at least five, since this will form a complete hunting party!

Hunters also have sub-roles within their hunting parties. Stalkers find the prey, Chasers pursue it, and Finishers take it down.

You will want to assign your wolves into hunting party roles based on their stats. Your wolf with the highest Smarts and Wisdom should be your Stalker, your three wolves with the highest Speed and Agility should be your Chasers, and your wolf with the highest Strength should be your Finisher.

There are a lot of intricacies to hunting which directly affect your success chances, and you can learn all about them in detail in our Hunting guide here.

Scouts
Scouts take care of uncovering new biomes for you to explore. Later on, they can also bring home amusement items for the pack.

The higher a scout's stats, the faster they'll be able to explore.

Technically, scouting is optional. However, it's highly recommended to progress in the game, and see everything there is to see! There's 12 biomes to explore, each with their pros and cons. Once your scout has fully discovered the first three biomes, you unlock the ability to move your pack, as well as to rescout biomes you've already discovered. After you've fully discovered a biome, you can move your pack there, for new shop items, new hunting, and new art!

You can read all about scouting in our dedicated guide here.
Herbalist
After your fourth rollover, illnesses will be introduced to you. Through normal gameplay, your wolves will get sick, and you can only cure them if you have an Herbalist. Herbalists can diagnose sick wolves, forage for herbs, and use those herbs to craft medicines for your wolves.

Make sure you have an herbalist around, just in case! Many illnesses are very severe or even fatal, so you'll want to be able to cure them as quickly as you can.

You can learn more about herbalism and illnesses in our dedicated guide here!

Breeding, Training, and Care

Breeding Male
In order to start breeding puppies early on, you may choose to set a Breeding Male. Your breeding male can breed to any in-heat female in your pack.

However, keep in mind that your breeding male is permanent. You can only switch breeding males early (meaning, before your old one dies) if you pay 25 GC or more. You may want to wait to assign a breeding male until you've acquired a wolf you're really fond of! Plus, if you decide to wait until your 30th rollover, you can just put a male wolf you want to breed into a pairbond instead.

You can learn more about breeding males in our breeding guide here.

Pupsitters
Once you start getting puppies, the only way for you to ensure that they survive is with pupsitters. Pupsitters directly increase a pup's Survival Chance, and pups are guaranteed to survive to adolescence if they have 100% Survival Chance.

Any adult wolf can be a pupsitter, and the only thing that makes them better at their jobs is their Proficiency. So, the more a pupsitter pupsits, the better they'll be at pupsitting.

Once you've assigned a pupsitter, you can visit the Pupsitting page to assign pups their protection.

You can learn more about pupsitters and raising puppies in our guide here.

Mentors
Mentors are an optional role, but one which may prove to be useful when raising pups!

Mentors are used when training puppies. Three-hour pup training lessons require a wolf with a specific role to teach them. However, if you have a Mentor, you can use the Mentor instead of the specific wolf role! If you have a Mentor with very high stats, they'll be able to help guarantee that your pups will get the highest stats possible from training as well.

You can read all about training, and how to maximize it, in our pup-centric guide here.

Miscellaneous Roles

Travelers
Travelers are Wolvden's most hidden role. They're even more optional than Mentors. In fact, they don't contribute to your pack in any way! They're purely for entertainment and player interaction, based off of a popular forum game. The role of Traveler is secondary, and can be applied on top of any other role.

In order to unlock the Traveler role, you must enable the setting on your Profile page. After this, you can scroll to the bottom of a wolf's page to set them as a Traveler.


Traveling wolves are sent to another player's pack through gifting. Once there, the player can edit the wolf's bio, add decor, or breed them if the option is selected. Many traveler owners write specific rules, so make sure to check the traveler's bio before doing anything.

The traveler's owner can recall the wolf at any time, meaning they will be removed from your pack and sent back to their home back. However, you are not able to recall a traveler if the wolf is pregnant or nursing pups, so use caution if you choose to make your traveler breedable.

If you do choose to make your traveler breedable, the person holding the wolf could set them into a pairbond if they've had them for at least 7 days, or breed them to any stud. The pups will belong to the current host of the traveler, not the traveler's actual owner.

If you no longer want a traveler you're taking care of, you can gift them to someone else or check to see if their owner wants to take them back. Chasing a traveler will send them back to their home back, but will delete all of the wolf's decor, and the owner will have to reclaim them into their pack using SC.

There are some practical uses for traveling wolves, besides just lore and games!

If you are wanting to send a wolf to someone only temporarily, such as to help out as a pupsitter or breed to a stud with no slots left, you can set the wolf as a traveler to help ensure that you'll be able to get them pack. As long as the player does not go inactive while the wolf is pregnant or nursing, you'll always be able to recall the traveler in the case of an emergency.
Mel 🏜
#201

Posted 2023-01-06 14:00:16
[ Reserved for future content ]
Mel 🏜
#201

Posted 2023-01-06 14:00:23
[ Reserved for future content ]
Mel 🏜
#201

Search Topic