Stylus: CSS for More than Just Your Den! (Guide, Layouts, and Templates)
|
Stylus: CSS for More than Just Your Den! (Guide, Layouts, and Templates)
|
|
|---|---|
|
Posted 2020-09-28 17:32:28 (edited)
Click to skip to the standard template and guide (11/24/2023: Currently I have made one, simplified template; I will eventually add another, fully labeled one). This guide also includes how to make your own simple backgrounds for free! Notice for if/when Stylus is not working! So, as often is the case with anything that involves programing, sometimes updates to Stylus make it unusable. If this is ever the case, I discovered (after one particularly bad break) there is a beta version of Stylus that usually works as a good backup! Stylus Beta for Chrome (For other browsers, you may have to dig or search specifically for the beta. I have yet to go and track them down.) All other instructions and info below should work the same with the beta version! Notice!The below guide needs some updating since I removed the guide to Stylish (it was malicious; Stylus is safe!). The guide below may mostly still work fine, but it references a lot of the old Stylish guide, so I need to go through this and replace that old info. Intro to Stylus/UserstylesHey all! This is a remake/repost of a guide I made for LioDen some years ago. There are also some layouts I have made (or there will be eventually), which can be found in the first reply of this thread. Eventually I will make a free template to go along with this. Now, some things about Userstyles, which uses either Stylus or Stylish browser extensions. Personally I use Stylus, though these layouts and guide will work for Stylish as well. Userstyles is the host site for css files, while Stylus/Stylish are the extensions that allow you to use them. You will need to install either extension, and you do not need a Userstyles account to use them or the layouts. These extensions in short allow you to apply a css file onto any site to have your own custom layout. If WD eventually has an option to disable CSS in user dens/profiles like on LD, I recommend enabling that. It's not that these layouts won't work when you come across someone with a CSS layout, it's just wonky things happen, like this on LD: 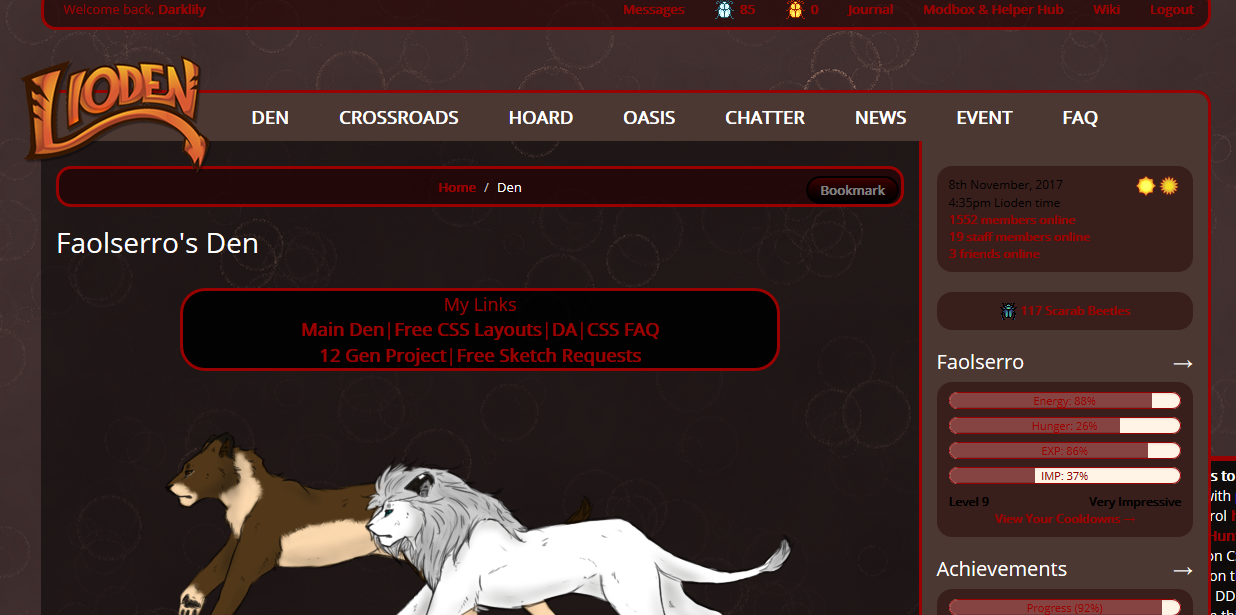 Installing/Using the ExtensionThe following is for Chrome and Firefox. I don't use any other browsers, so I can't necessarily help with those, but in my experience, if you know how to work extensions, it's pretty straight forward. StylusSo installing Stylus is basically the same as the above, just search for Stylus instead of "Stylish"! Because of that, I'll just explain here how you use it after you install it.
 The editor will look like this. And it also has some nifty tools like this for getting colors:  Little tip! To get this to come up easy, I just put in "#000", which is black, for the value, then you click on the black (or whatever color) box and this menu should appear. You can use the second bar, by the way, to adjust opacity too! |
 Darklily #1058 |

|
Posted 2020-09-28 17:32:41 (edited)
LayoutsDark Blue (Needs fixes, has some quirks since I'm still figuring things out around WD) Purples. Much like the Dark Blue, but I adjusted the colors to be purples and change the background to a simple black with purple. Brighter than the Dark Blue, but not too bad. Dark Rainbow; A darker rainbow background ('cause I'm tired of only ever seeing them as pastel/bright lol); more or less the same as the dark blue but shifted all colors to the red side of the spectrum. Main body (center of the site where everything is) is semi-transparent black so that the background can be fully seen but is not distracting. Light/Bright Winter; A bright theme (rather than dark like all the others lol) for the winter season! I will be doing alternative versions of this (one without the window; then two dark, both with and without the window). I may adjust some stuff with the hoard; I'm not 100% sure how I feel about the colors of hoard items. Labelled Template (WIP!)Not yet added; it will be added here since the next post about the other template is too long lol Expect some time for it to be completed, as I don't actually know what everything is anymore and need to figure it out. ---------------------------------------------------------------------- Other User LayoutsHere I will do my best to post links to other users creations I've seen around the forums ^^ wolvden site-wide darkmode by lazy. |
Darklily #1058 |
|
Posted 2020-09-28 17:32:51 (edited)
This template uses my own personal preferences for grouping together elements, removing some to make things work, and transitions and other effects. Below is my guide on creating a color palette and background image(trust me, it's easier than you think thanks to some free tools!). This will apply well to both templates, but is mainly for my standard one. Making a Color PaletteFirst thing you should know, there are technically about 12-15 colors you'll need with the above template (standard template), given how I've grouped things together, but you may use less colors than that, or, like I do, only make slight variations to existing colors. Your color palette realistically should be maybe at most 8 colors and I suggest 4-5. Before you begin with the tools below, I suggest thinking about a few things: - What colors are pleasing to you to look at? You're the only one who will see the layout, so the colors should be pleasing for you, and what may be pleasing to me may look obnoxious or even unreable to you. That's just one of quirks of colors and being human, as we all see them differently than each other. Tools to Make Your Palette Color-Hex has an amazing tool for visualizing your palette! Or you can browse already created palettes here! There are likely other sites out there with similar tools, so feel free to search around your favorite if you have one. Here's an alternative means as well! Open up your favorite image editing or drawing program, basically any tool that let's you draw with customized colors. The key is that the program needs to be able to tell you what the color is. Play around with colors by just drawing splats or lines of them next to each other. It's just another visual way of trying it out. You could also, if you have the know how, take a screenshot of a WD page and play around with the colors to see even more so what it may look like in a live layout. The only reason I might suggest this method is we'll be using such a program to make the background image itself in the next step! Making Your Own Background Made Easy!So the issue of proper credit and permissions can come up with selecting an image to use for your layout, and it's something as an artist myself I take personally. I mean, we're also living in the day and age of AI and the concerns it brings artists over similar issues of permission and use. Because of all that, I'm going to teach you how to make a background image you know you're allowed to use, because you made it yourself! Tools Needed - Your favorite drawing program -- I will be walking you through doing this with two programs, Sketchbook and Krita, both of which are free (or at least have a free version available with the needed tools). - A desktop or laptop. I can't guarantee this will work with say an ipad or chromebooks; ipad maybe depending on the apps you have, same for chromebooks. - Mouse or drawing tablet if you have one; this process can easily be done with your standard computer mouse or with your laptop's trackpad (touchpad), no tablet needed, but if you have one you may find that more comfortable. Most of the example images were made with just a standard mouse. - Your creativity and imagination, or even just your inner child that wants to splatter paint and stickers on the walls lol Using SketchbookSo, sometime ago, Autodesk Sketchbook became my favorite drawing tool, and at some point they released it for free. Now, the latest version is $10 (at least in the Windows store), but you can still find the previous free version here (this is straight from Autodesk!), for both PC and Mac. Install the program and you should be nearly ready to go. Next we're going to find some brushes, which is where the magic really happens! Guide for using Sketchbook hidden in the spoiler below! You can do a google search for Sketchbook brushes, but Sketchbook has some great ones on their site for free download! Here's the link! Two of my absolute favorites is the Storybook collection and the Splatter stamps. These are the brushes we'll be using for the example I'll run you guys through. Here's how to install the brushes! If you're struggling, I can probably help with some screenshots, but it's pretty straightforward to follow the offical guide. What Size Image? By default, if you haven't changed it, Sketchbook will use the the resolution of your screen (minus some pixels at the top, because of the window of the program), but you may want to change it to a normal, standard resolution. Here's a list of standard resolution sizes: High Definition (HD) 1280 x 720 Full HD, FHD 1920 x 1080 2K, Quad HD, QHD 2560 x 1440 4K, Ultra HD 3840 x 2160 If you need to check your display resolution, I suggest looking up how to find it for your device. Sometimes your screen resolution isn't the same display resolution, so using a site like this one won't give you the actual number (it's going to give you more like the size of physical screen size; ~1 inch is 100 pixels [96 to be exact]). The means to check your resolution is going to be different between devices, so it can be a bit hard for me to give the info here; google will be your friend there lol Setting the Size Once you've figured out which resolution you want to use, go to Image > Canvas Size (seen here). As much as you would think Image size is the right one, it's not. We want to set the canvas to the right size first and foremost. This will open up a box that looks like this (as you can see, my default is a little short of full HD resolution). Little tip: higher resolution will look nicer on setups designed to handle them, but will take longer to load on weaker machines. Change the numbers to the size you want, ideally your own resolution, but if you're doing this for others, you may want to try a higher resolution. Once you've put the numbers in, hit ok. Setting Up the Toolbars So now we'll want to get comfortable with the layout of Sketchbook. Your preferences are likely going to be different from mine, so you'll want to play around with things until you are comfortable. This section I'll give my preferences and tips. First we'll want to go to Window at the top left and select which tools we want open. If you ever accidentally close any, this is where you'll find them. My preferred toolbars/boxes. I personally don't use the color puck as it can be confusing to use, but the brush puck is amazing! It's a quick way to adjust the puck. To use either one, click on it and drag, both left/right and up/down have their own functions (for the brush: up/down is opacity usually, or sometimes flow or strength for some brushes, left/right is size). Here's my standard workspace layout for drawing with Sketchbook! With the way my brain works, I like things off to the side, but not the exact edge, as then I process it's actually movable lol One of my favorite things about Sketchbook is how customizable everything is, and you can click and drag your tools around wherever you need to so it's comfortable for you! (For those wondering, Sketchbook Extras used to be an implemented way to download and install the brushes directly in the app; since a new version has come out, this service doesn't work anymore, but you can still find the brushes on their site.) Using the Color Picker to Save Colors This is something I honestly always forget I can do with Sketchbook, but it's an amazing thing. If you made your color palette in Sketchbook, it will make it even easier to use colors from your palette in your background image too! If you look at the bottom of the color palette I have saved, starting from the dark, almost black blue and going to the very bottom row, this will be my palette for this practice!. Now, as for how you actually get the colors you want into that, click and drag on the color displayed at the top of the color wheel after you have it set to the right color (as seen here) and then drag it down to the empty space in the color palette (seen here). Accessing the Brushes So once you have your brushes downloaded and installed, you'll want to open the brush library (which you may still have opened if you just installed the brushes). The quick way to open it can be seen here in the brush toolbar, or you can go back to Window and check the Brush Library option on. Play around with the brushes you've installed to get a feel for them until you find some you want to use. For the example I'll be doing, I want pretty much just the Synthetic Spill brush from the Splatter Stamps pack. Now, I can do one of two things to get this brush into my toolbar ("brush palette"). I can either pin the Splatter Stamps pack to the palette (shown here) or I can click on the brush and drag it over to the toolbar, moving it to the standard set of brushes instead. I prefer this second method, as it's a brush I use quite often, but if it's a less used brush, I might recommend just pinning the set and swapping sets as needed. On to the Painting! First we're going to set the background color. This is done easily by going to the layers box and finding the one called background. Hit the likely white dot, which will bring up the color picker. Now, if you already have a color from your saved palette you want to use, instead go to a normal layer (by default there will be one, called Layer 1) and just real quick use the standard paintbrush brush to place down a dot of the color you want to use. Go back to the color picker for the background layer and find the dropper symbol, then click on the dot of color you placed. The background will immediately change to the color you selected with the dropper! Here's the background color I'll be using. Next I'm going to use the spill brush and actually get to painting! For my example, I went with a simple start from the top with darker colors then fading into the lighter colors as I went down the canvas. With this particular brush, it's easy enough to do as it will blend the colors as I go. I more or less just clicked and dragged from the top to the bottom with the first color, then started from slightly lower with the next, and continued until I got to the last color. I also moved the brushed left and right a bit with the mouse as I went down with each streak. I recommend with this particular brush to be zoomed out quite a bit as you can see here (at the very top left the percentage shown is the zoom). For this image, the brush size I'm using is ~200, so working zoomed out helps to really see what's happening with the full picture. Below I'm just going to show you the steps of all the different colors; I put each one on it's own layer in this case, but sometimes you might not want to do that. For the brush flow, I started at 100% for the first color, then dropped to about 75% for all the others. 1st, 2nd, 3rd, and lastly 4th. For this particular one, I'm going to call it done there. My advice to you is to keep playing with it till you're happy with it! Play around with other brushes and see what you can come up with! Anyway, once you finish, it's just a matter of saving it. By default, Sketchbook will want to save the image as a .tiff, but we need it to be a .png or .jpg (or .jpeg), so go to save as instead of save (or you can choose the right format from the dropdown if you just use save). Just name the file whatever you want to name it and make sure you add either .png or .jpg at the end of the name and it should save it properly. .tiff images will save the layer information, so if you need to come back to the image for any reason, I would save a backup as a .tiff as well, or .psd even as that can also be opened in most other image editing/painting programs with the layer info saved. Here's the completed image! I also did a different one by playing around with the radial symmetry tool Sketchbook has for another fun effect here. I prefer the first one for my standard layouts, but if I played around with opacity of the #main element, the second might not be bad. The idea of these "simple colors" layouts is a design for the background that is more or less the same across the whole image, with no particular area of focus to draw the eye like the second one does, but if that's your preference it's always an option! I design my layouts to be this way so they are pleasing but not distracting to look at. Using Krita!So the benefit to using Sketchbook is I feel it is easier to understand and pick up, but Krita, the other program I use for these backgrounds, has so much more potential and many more brushes out there for use (or at least that I know of). Krita is also free! Krita's official site. It works on Windows, Mac, and even Linux! Krita guide within spoiler! Krita has so many brushes out there to use! Just do a quick google search for them and I'm sure you'll find something that peeks your interest! There's also a site that has a place where artists post their own brushes they have made. Instructions for installing brushes will depend on how the brushes were saved, so be sure to check the creator's descriptions to find instructions. What Image Size (More or less the same as the Sketchbook version) So, once you have your brushes installed, go to File in the upper left and then New. A popup will open where you will be able to set the pixels, and some other technical stuff that I honestly don't really understand lol For now, just focus on the Image Size part, with the width and height. Below is information on some standard screen sizes: High Definition (HD) 1280 x 720 Full HD, FHD 1920 x 1080 2K, Quad HD, QHD 2560 x 1440 4K, Ultra HD 3840 x 2160 If you need to check your display resolution, I suggest looking up how to find it for your device. Sometimes your screen resolution isn't the same display resolution, so using a site like this one won't give you the actual number (it's going to give you more like the size of physical screen size; ~1 inch is 100 pixels [96 to be exact]). The means to check your resolution is going to be different between devices, so it can be a bit hard for me to give the info here; google will be your friend there lol Using Krita Now, Krita is a bit more difficult to understand than Sketchbook if you ask me, but once you do understand it, it is nice to use. First familiarize yourself with where everything thing is. On the left you'll have the toolbar. The brush and the fill tools will be the only two we will be needing for this example, but feel free to check out the others. The fill tool, if you're unfamiliar with such symbols, is the bucket I have selected here. Now your brushes and colors on the right side. Your layers are also here, between the color picker and brushes. Unfortunately, unlike Sketchbook, there's not a fast way to save a color palette, other than just leaving dots of colors on a layer and keeping it handy, but there is a color history seen on the right side of the color picker. This only keeps track of colors you have used for the particular image (and I believe "session" if you would, so if you close the program and come back later, I don't think it remembers). The other main thing we'll need is to know where to change the brush size and opacity. This is done at the top of the window, shown here where it says size and opacity. Using these sliders, click and drag to the size you want for the brush you are currently using. The background color for the canvas is also funky. Personally, I've never been able to get it to change from white, so we'll just have to use the fill tool to create a dark background on a normal layer. For the example I'm going to do here, I'm going to basically make a sort of night sky looking image, but nothing too fancy. I'm using some cloud brushes and a brush called "starfield" that I found. First I just sort of went all over the canvas with the starfield brush, starting with the darkest color and then working up to my brightest. Here's what it looked like after that. Next I went to the cloud brush I decided to use (I have like dozen or more myself, so trust me, there's a ton to choose from!), and made another layer. Here's what it looked like after playing around with some dark blue-grays and a few brushes (I also named the layers on the side at this point, just so you guys can see what's going on there). Not a half-bad, simple night sky if you ask me! So, let's say I'm happy with it, what now? Well, very similar to Sketchbook, I go to File at the upper left, but now I go to Export, not Save (though I may want to save a Krita file of this if I ever need to go back to it). Export gives us the options of image files rather than saving as a Krita file. Again, just name the file whatever you want and be sure to end it in either .png or .jpg. If you use .jpg, a popup will ask you the quality you want to set it to, with the higher being closer to actual image you drew (lower will get blurry). .jpg images are smaller than .png, and quality also effects size, with more quality being a larger file size (not image size, though the size of the image also effects the size of the file!). Keep these things in mind when deciding what to save it as. Saving as .png will also have some popup options, but all of the defaults should be good without getting technical about it. Here's the finished product, which I did as 4K resolution just to test! Like with the Sketchbook guide, I feel the need to say that this is just my own little example. Play around with your brushes and colors until you find something you like and run with it! Whew! Now that's done with. Now you just need to upload the image somewhere where you can get a link to it. Imgur is half decent, or Deviantart's Sta.sh (though the image's link will be ridiculously long lol). Anyway, I hope you found this little guide helpful for making backgrounds! Here I keep a lot of the images I have made using these methods, if you're looking for inspiration or even would like to use them yourself. They are free to use! |
Darklily #1058 |
|
Posted 2020-09-28 21:21:00
This is awesome! I'm trying to figure out how to make my own css for my den. Is it possible to make a css for a den this Stylus? Do I need to host it on a different site? What do I need to paste into by den design description? Thank you |
 Naburius #2464 |
|
Posted 2020-09-28 21:29:14
Unfortunately, Stylus is "client-side" so to speak, so it only displays for you specifically if you install a layout, and I have yet to figure out if it is possible to use Userstyles as a host (I doubt it, also there are much easier/faster ways, like Dropbox). You could have a layout for your den specifically, but no one else would be able to view it. Honestly, explaining how to host and apply the css file takes a bit of time. It's late my time (past midnight), but if someone doesn't beat me to it, I could probably whip up a guide tomorrow that would answer that question. In short, if you can figure out the hosting and getting the source link for the file, you just need to put it into this: <link rel="stylesheet" type="text/css" href="LINK HERE"> |
Darklily #1058 |
|
Posted 2020-09-28 21:31:56
Also, I don't know if you have an LioDen account (or if forum post can be viewed without login), but I have a FAQ thread for CSS over on LD. Feel free to check that out for some help in the meantime ^^ |
Darklily #1058 |
|
Posted 2020-09-28 21:37:32
Thanks for the information, I do have a Lioden account. I was excited about stylus but that makes sense. I'll check the css thread out on Lioden. Thanks again for your help! |
Naburius #2464 |
|
Posted 2020-11-15 15:11:39
Update Added a purple layout and made a short guide on using Stylus. Still working on the template! |
Darklily #1058 |
|
Posted 2021-01-27 11:53:04
Coool! I love them,! |
 🌺🌸🐺ultrazorua🐺🌸🌺 #32141 |
|
Posted 2022-06-19 10:12:57
|
✨ Kal 🌈 #71816 |